This article will show you how to use a Lyyti event to create, send and manage recipients of your Newsletters.
Create an event
Type of registration
Start by creating a new event in Lyyti. You will only need one event for all your sendings. Thus we advise you to set the date of the event far away in the future to ensure it remains active. This also applies to the registration date limit as well if you also use this event to collect subscribers.

If you plan on collecting subscribers to the Newsletter through different channels, for instance social media, we recommend that you create your event with participant types.
If you create your event with participant types, for instance a type Facebook & a type Twitter, you will obtain an open registration link for each type that you may share in these media.
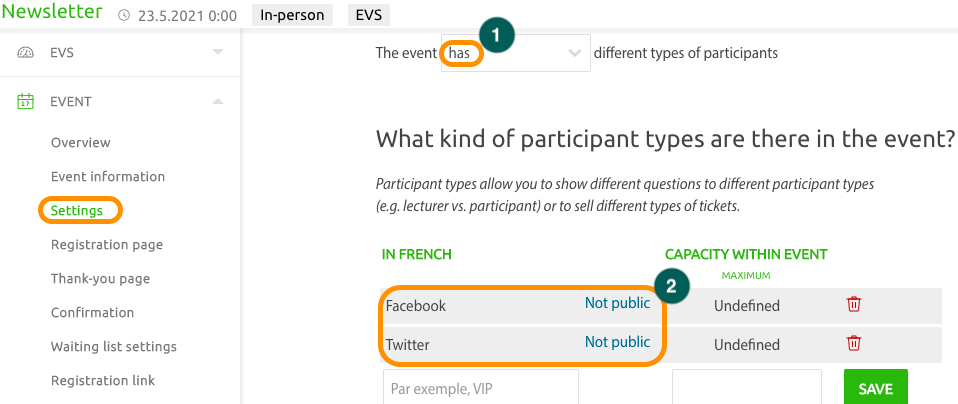

Thus, if one person signs up to the Newsletter using the link shared on Twitter, this person will have the participant type "Twitter". This is a good way for you to track where your subscribers come from.

Registration page
If you are using this Lyyti event to collect subscribers to your Newsletter, there are a few details to address. The first one concerns the Registration page. By default, Lyyti includes the 2 standard fields : "Event information" and the question "I will participate".
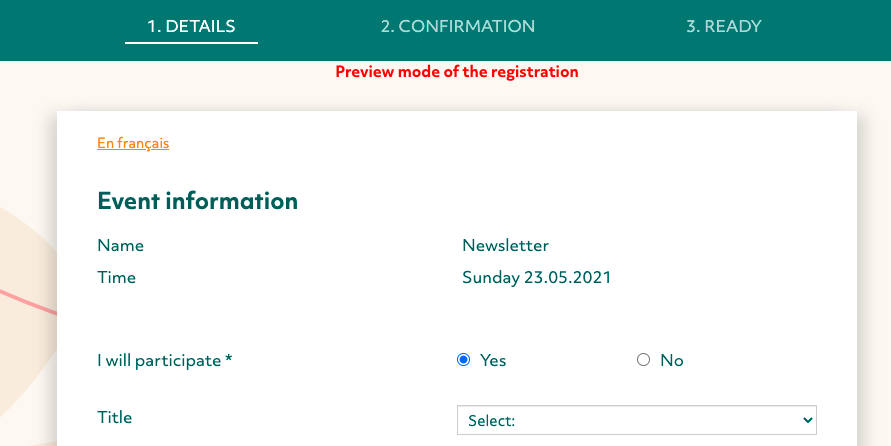
These are not appropriate for a Newsletter as it is not a "one time event". Thus we advise that:
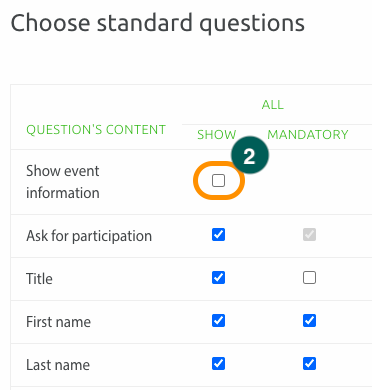
1. You remove the "Event information" field by unticking it from the standard questions.

2. And that you rewrite the "I will participate" question into a more appropriate question. For instance "I will subscribe to the Newsletter".


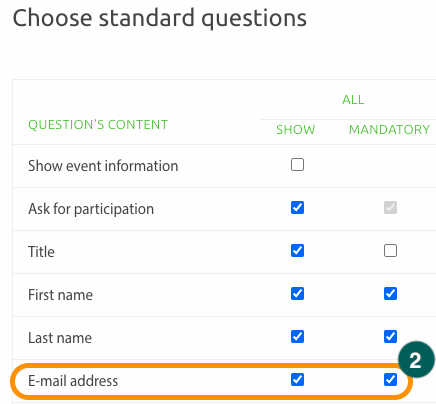
3. Also please ensure that you are using Lyyti's standard question to collect email adresses. Lyyti can only send emails to addresses collected via this standard question. Answering this question should also be mandatory for your future recipients.

Thank-you page
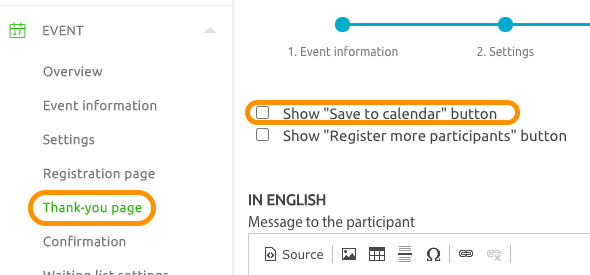
In the Thank-you page settings, make sure that the option to save a calendar note is de-activated.
Confirmation page
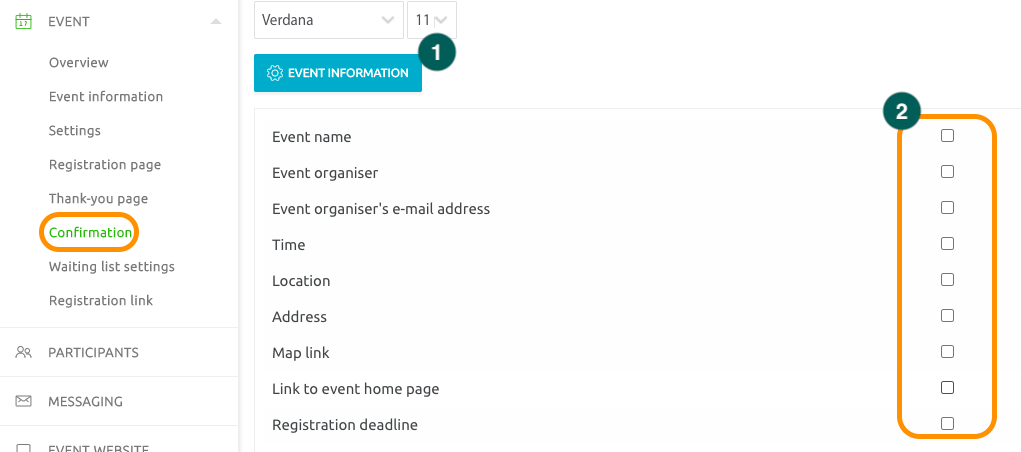
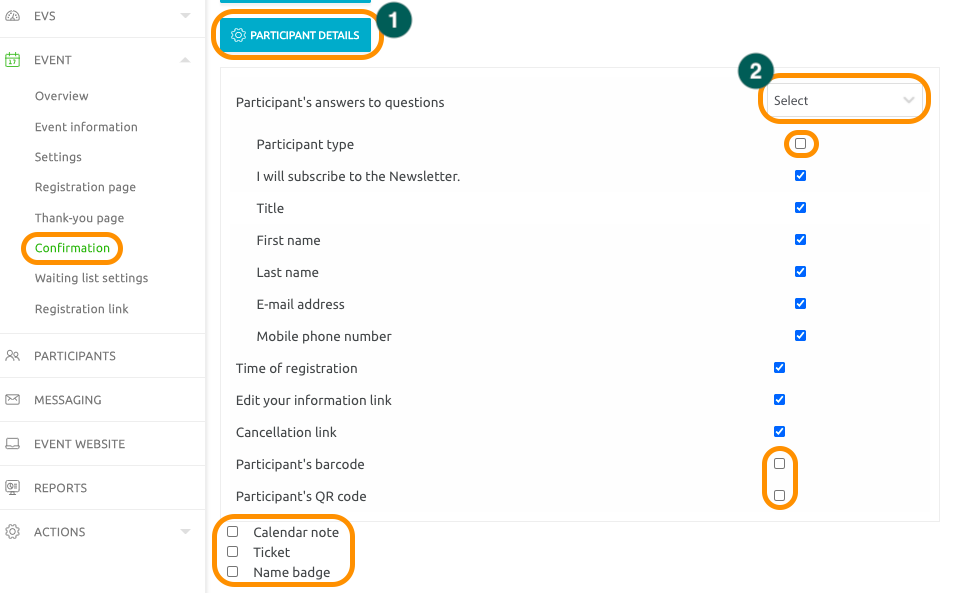
A confirmation message might not be necessary in this case, but if you wish to send one, make sure that the following are unticked.
1. Untick all event information
2. Untick certain participant details fields & other options
Manage your recipients
If you have an existing list of subscribers to the Newsletter, import them into Lyyti in the Participants section. They will have the status "not-reacted" by default.
If you get new subscribers to your Newsletter through open registration links as well, they will have the status "registered".

Create your first Newsletter
In Messaging, you may create your first Newsletter. For additional details about creating emails in Lyyti, you may check this article detailing the process.
If your Newsletter always has the same visual identity, we suggest that you copy your first iteration to create the following Newsletters. This would allow you to save time.
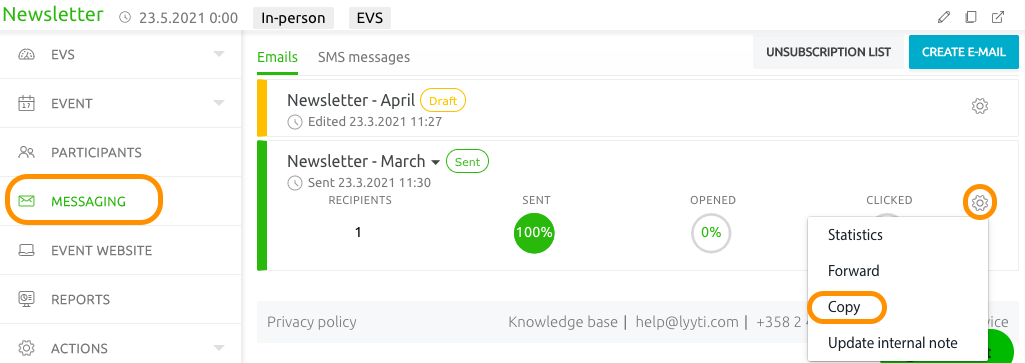
You may also save your Newsletter as a template. More information about that here.
Send your Newsletter
Once your Newsletter is ready, simply send it to either all your subscribers, or certain types of subscribers depending on your needs. You may use filters to select your recipients quickly. More information about filters here.
If your number of recipients is large (for instance above 1000), we recommend that you schedule the sending. This ensures that your browser does not crash.
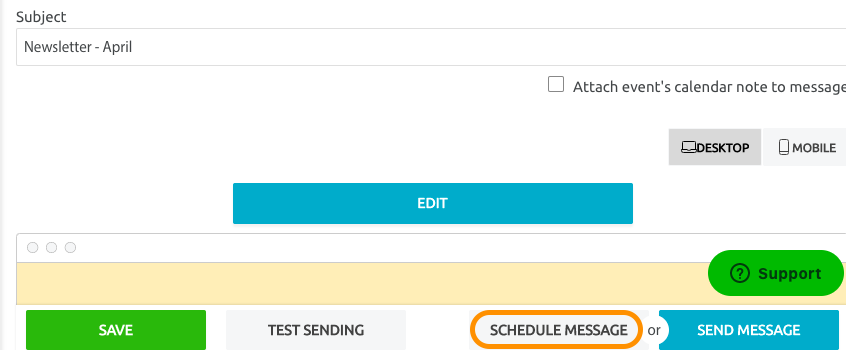
Let's take an example. If you send your Newsletter to 2000 recipients without scheduling, your browser will open 2000 "tasks" at the same time, which would be straining.
Whereas if the sending is scheduled, your browser will open one "task" after the other, which is considerably easier to handle.
Tip
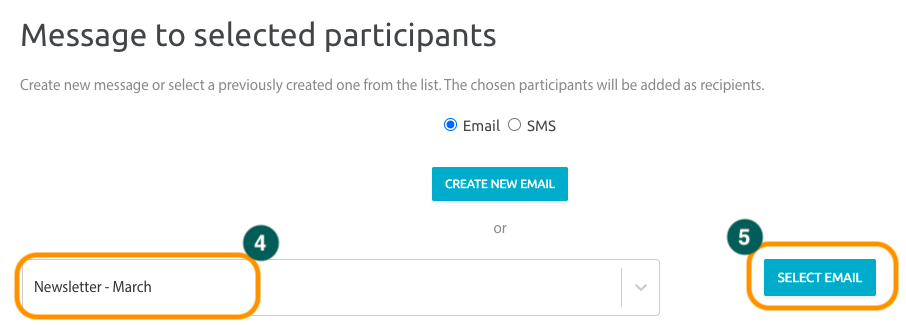
You decide to send your Newsletter monthly on the 20th. We are in March, you sent the Newsletter on the 20th. On the 23rd, you get new subscribers to your Newsletter. You wish to send them March's Newsletter instead of waiting for April. How to select these new subscribers as recipients ?
1. Go to the Participants section and select the column "Time of registration" in your view.
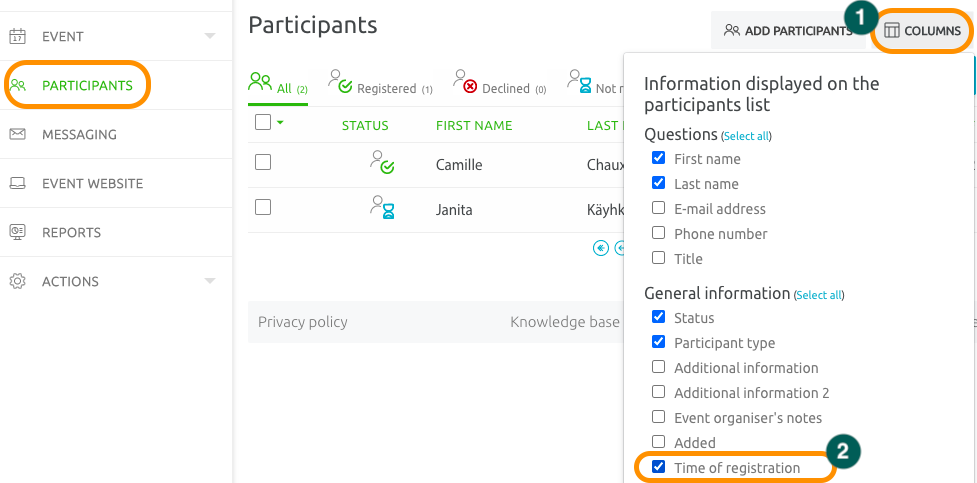
2. Once this column is displayed, you may sort participants by registration dates, from the latest to the first in this case (arrow facing upwards). Then you may simply select the latest subscribers and send them the Newsletter.


Comments
0 comments
Please sign in to leave a comment.