
Please be aware that Lyyti is developed constantly and your view might not match 100% with the view described in this article.
E-mails sent from Lyyti can be invitations, reminders, thank-you messages or surveys - whatever it is you need to communicate to the event's participants! With Lyyti you can easily personalise the message to the whole group of recipients or narrow down the list of recipients based on participant status or a specific answer.
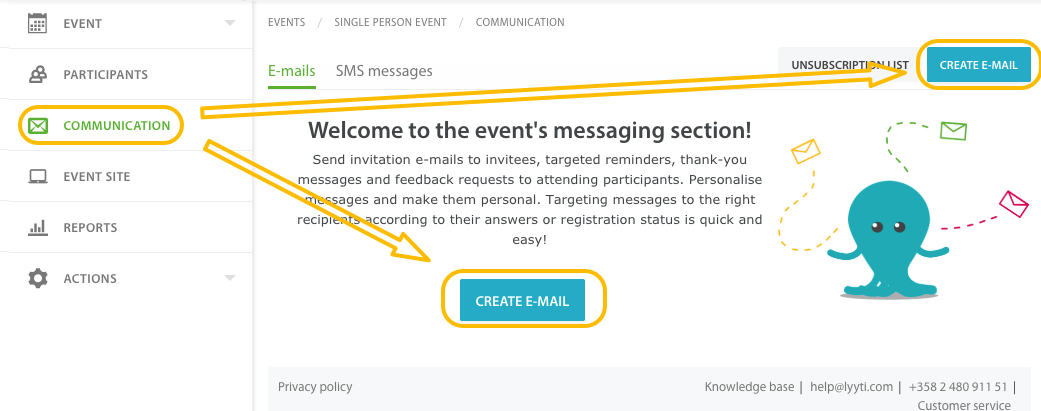
Create a new e-mail by clicking Communication in the left menu, and then Create e-mail.
Select message's sender, recipients and subject
1. Name and e-mail address of sender. Click Settings if you want to change the sender or the reply-to details. Under Settings you can change the sender or reply-to details and write down an internal note of the message content. The note will not show to the recipient, only to you as the organiser.
2. Choose the recipients. Click the Message recipient(s) field and choose your recipients, either by filtering (e.g. registered participants) or by choosing one by one. Learn how to select participants.
3. Give a subject to your message.
4. Edit your message. You can learn more about creating an email message in this article: Messaging editor
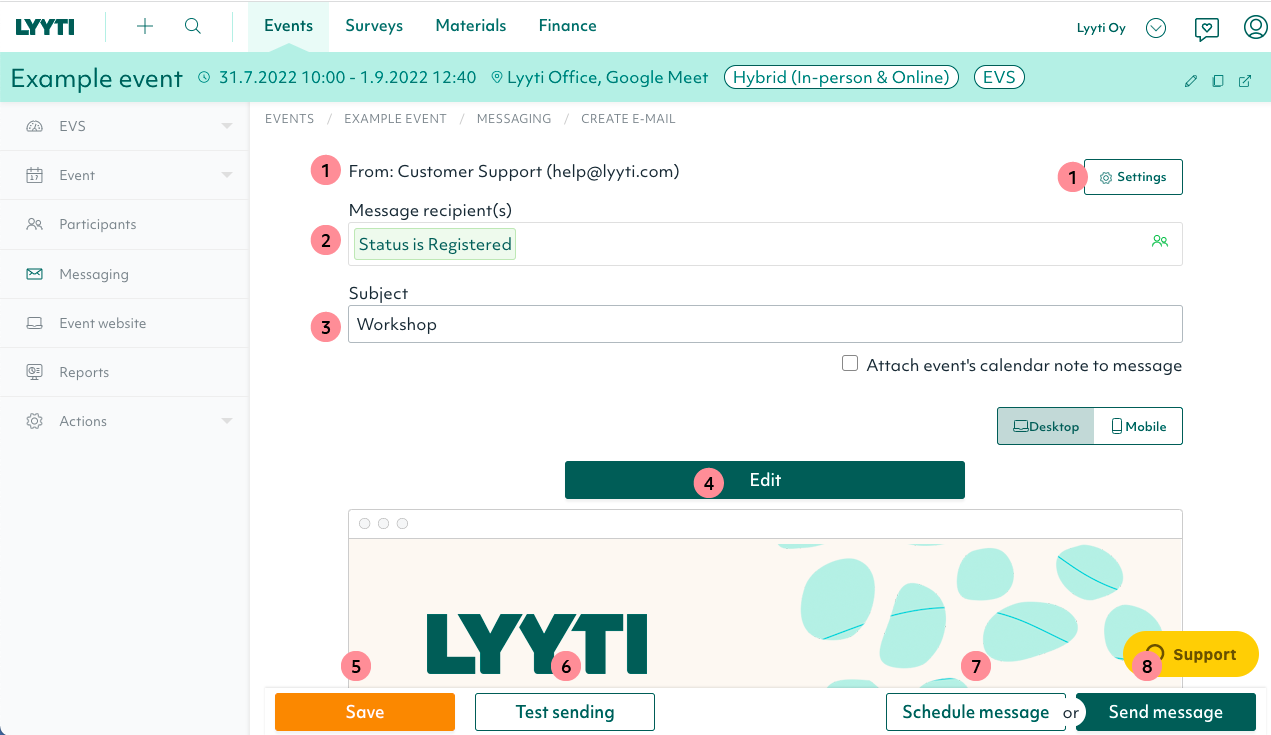
5. Save your message. This will allow you to save all settings for later editing.
6. Do a test sending. Here you can choose the participant information you want to add to the message and to which e-mail address you want to send it. This way you'll see exactly how the message will look to the receiver. The test sending doesn't affect the sending statistics and also doesn't lock the message like a normal e-mail. Therefore we strongly recommend that you use this function!
7. Schedule your message. If you are going to send your message to many recipients (thousands or even more), please schedule your message instead of sending it from your browser. Scheduling will ensure that the sending process is done from Lyyti's server and the sendout is carried away without any possible hick-ups in your internet connection.
8. Send your message straight away.
- if you choose the receivers one by one, the message will only be sent to these specific receivers
- if you choose the recipients by filtering, the message will be sent to those who match the filtering terms at the actual time of the sending.
Comments
0 comments
Please sign in to leave a comment.