Please be aware that Lyyti is developed constantly and your view might not match 100% with the view described in this article.
This feature can be used with the following license packs: (Starter), Basic, Professional, Enterprise
In this article you'll find basic information on how to create messages with the messaging editor. There's also a short video about using templates.
Click Start creating message. You can use a ready made email template for your message (a) or start from scratch (b).
a) Using Template
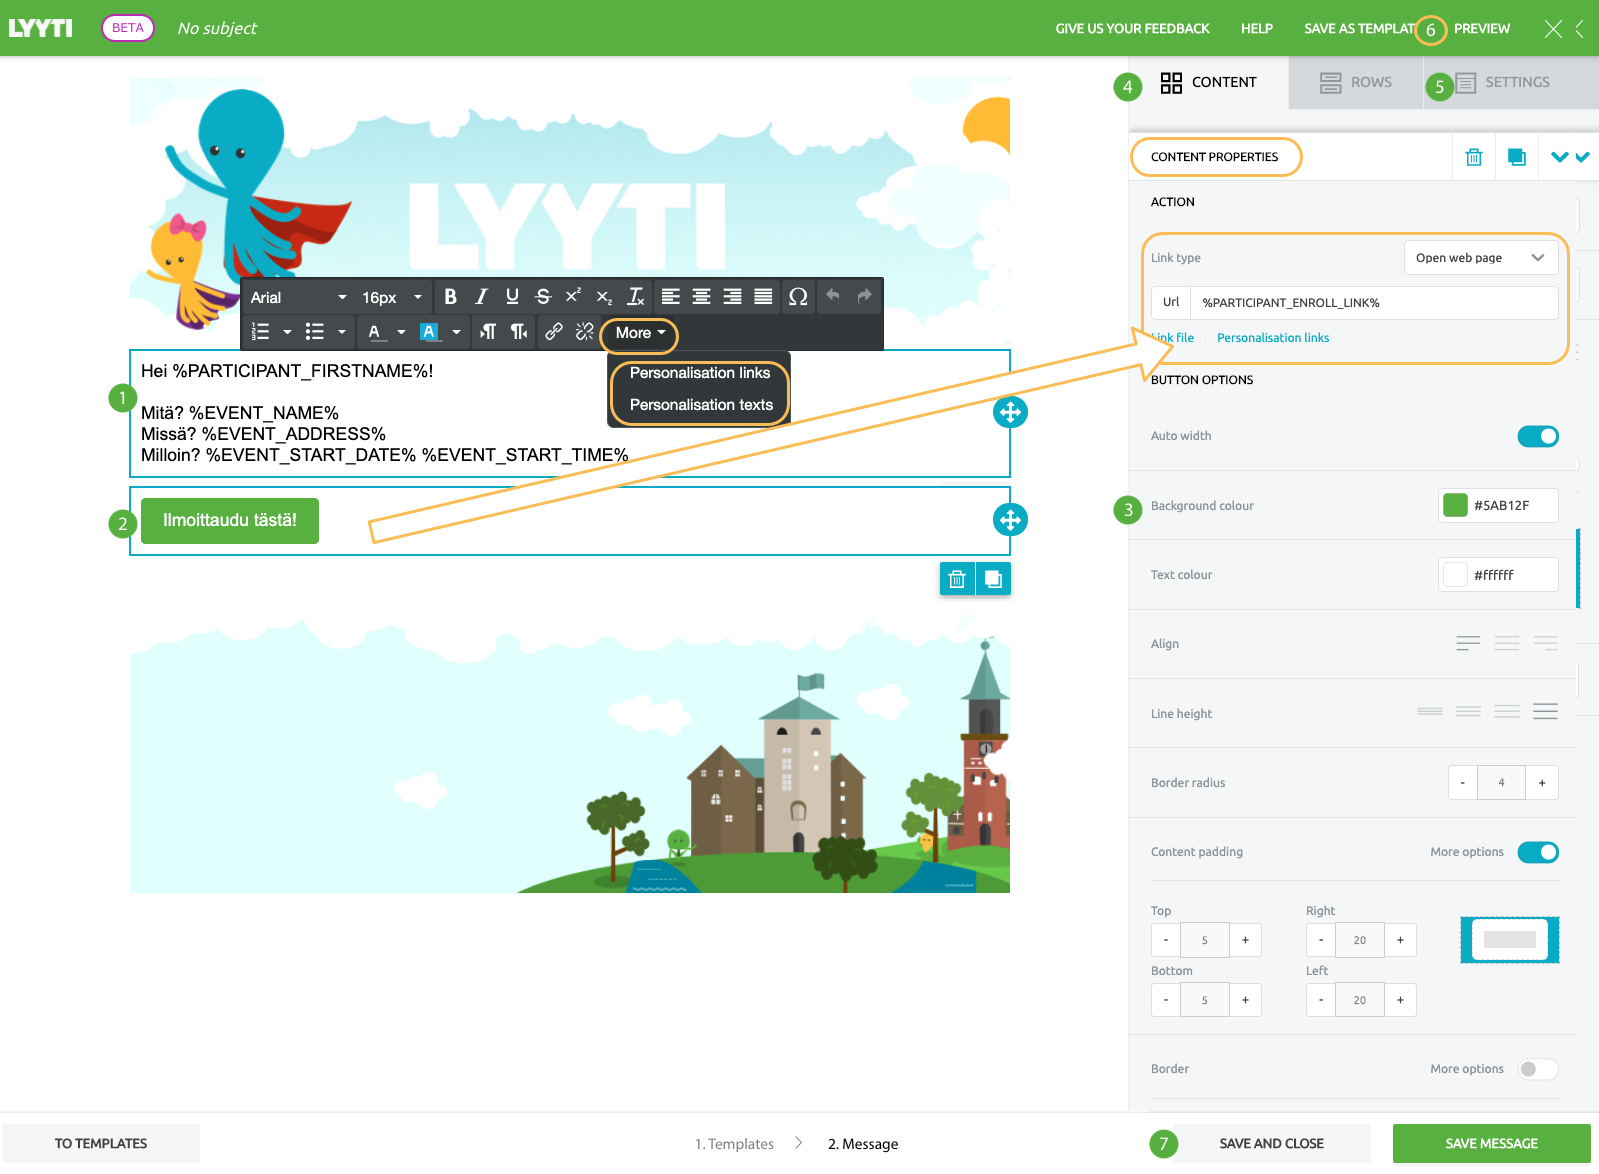
- Click on the text area for adding or editing text. You can change the font, change its colour etc.
Personalisations are in drop-down-menu More. You can add personalised texts and links (e.g. personal registration link) to your text - Edit button text by clicking the Button content. You will find Content Properties on your right hand side.
Change the URL for your button by adding the address. If you wish to use personalised links, e.g. personal registration link, click on the turquoise text Personalisation links. - You can edit button options, for example change the colour of your button. To edit the text on your button, simply click on the button.
- You can drag and drop new content to your message from the menu on the right. If you add social media buttons, remember to change link URLs (see #2).
Select a general style for your icons. - Settings will affect the whole message. Here you can edit your message width, background colours, default font and link colours.
- You can preview your message, both in desktop mode and in mobile mode.
- Save and close the message to continue with the sendout

b) Start from scratch
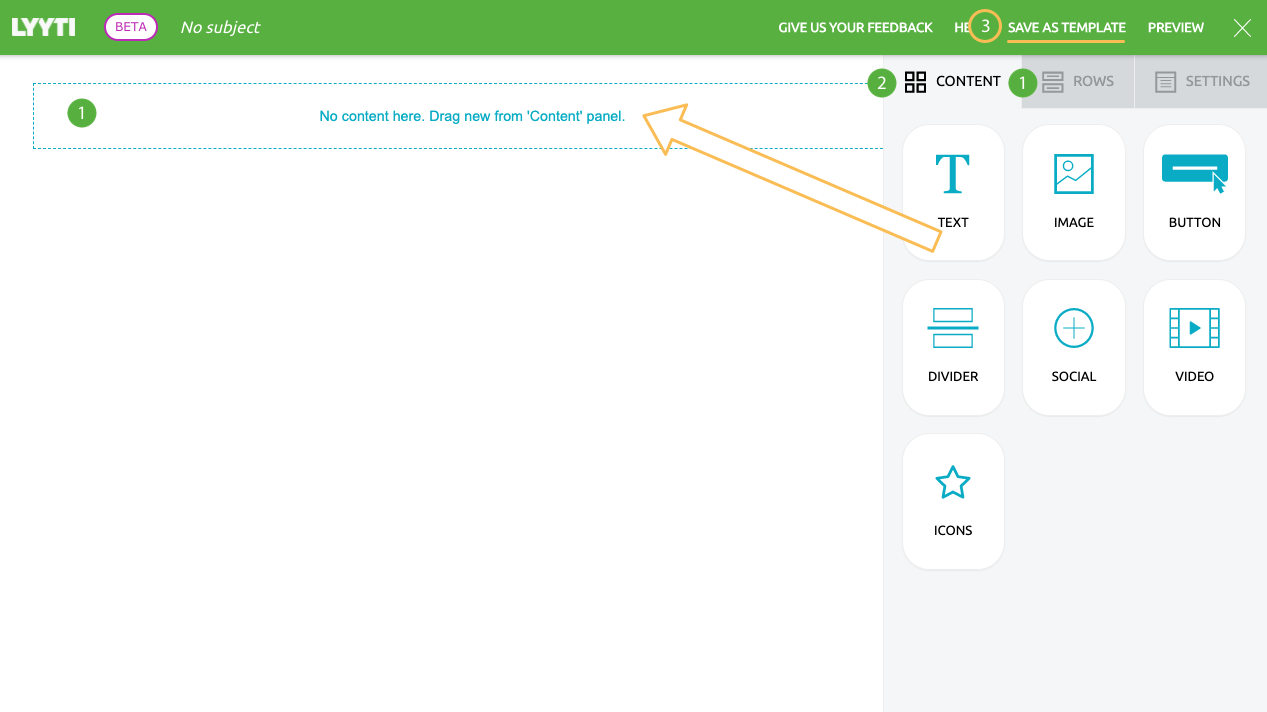
- When you start creating your message from scratch, you need to set up row. A row can have either one column or up to six different columns. Drag-and-drop new rows to your message from the right.
- Drag-and-drop content to your columns, and edit the content. For more information about contents, see Using Template -part above in this article
- You can save your message as a template. Publish the template so that you and others in your organisation are able to use the template in their messages.

Tips for the messaging editor
You can adjust the width of your message in Settings. Default size is 800 px.
If you wish to add a background picture in your message, we recommend that the background image's size would be 1024px - 1500px so that the picture will look good in most of the receiving email softwares.
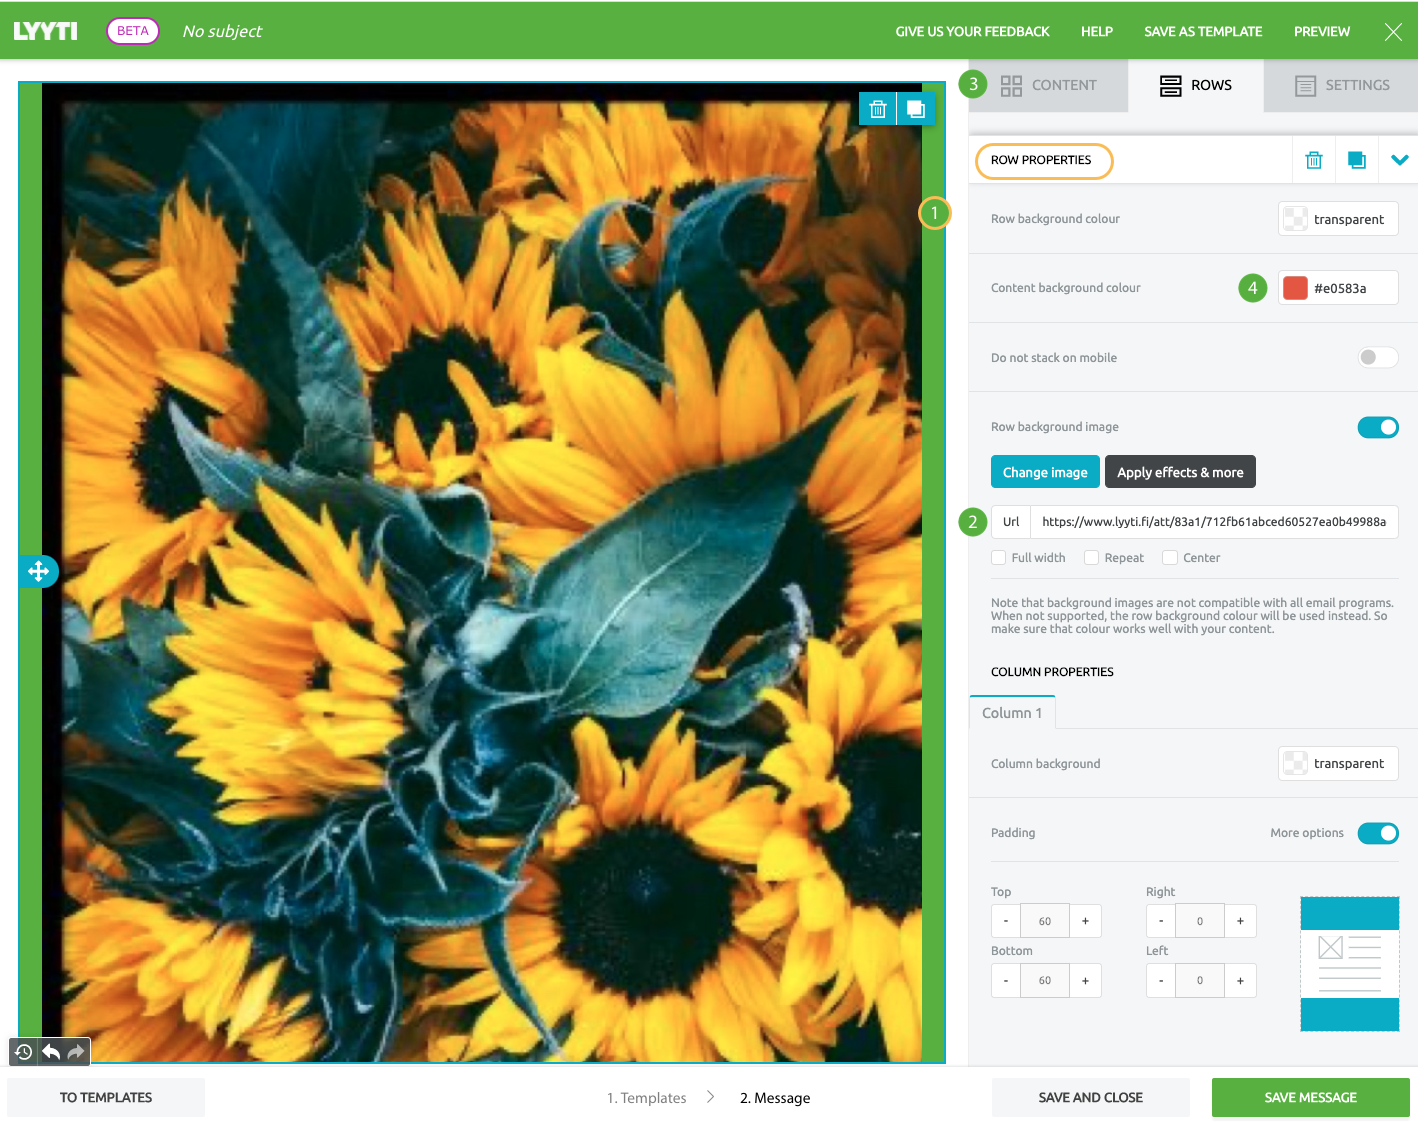
- For adding a background picture you need add a row and content. Then click on the row, not the content (green in this example). You'll see row properties on the right
- Add image from your Material Bank
- Add content (Text) on top of the background picture. Add as may contents as needed for the picture to be shown fully.
- Not all email programmes will show background pictures. Just in case we recommend that you'll add a background colour for the row too.

Do not be afraid to test! There are a number of possibilities for creating great looking e-mails! You can also undo changes you've made and go back to the previous version of your message!
N.B. If the picture's are not showing, it might be that the receiving end (Outlook) is blocking images. You can read more about the issues with Outlook from here.

Comments
0 comments
Please sign in to leave a comment.