
Please be aware that Lyyti is developed constantly and your view might not match 100% with the view described in this article.
This feature can be used with the following license packs: Starter, Basic, Professional, Enterprise
There are a number of personalisations you can use in your event. These will help you to personalise registration pages, confirmation messages and e-mails.
Personalisations can be used in open text fields in different parts in Lyyti. N.B. There are different codes for confirmation message!
Registration page personalisations
To personalise your event's registration page, you can add personalisations to the
1) Opening text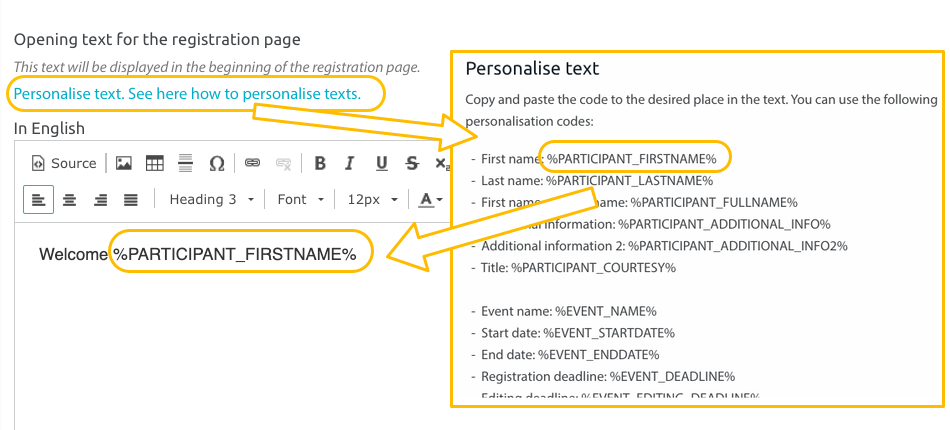
A list of personalisations that can be used in registration page can be found when you click the turquoise text Personalise text. Copy the personalisation, including percentage marks, and paste it to the opening text.
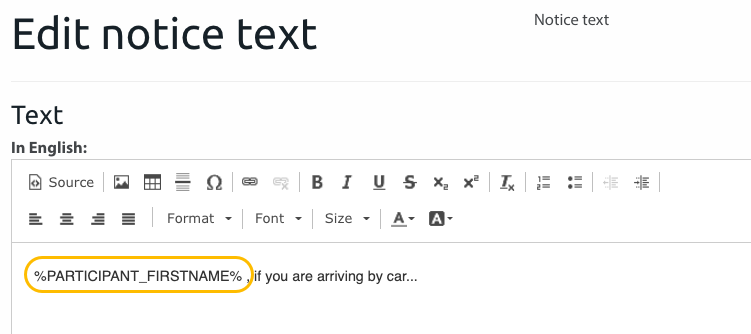
2) Notice text
Personalisations can be used also in notice texts. You can paste the copied code to the text editor.
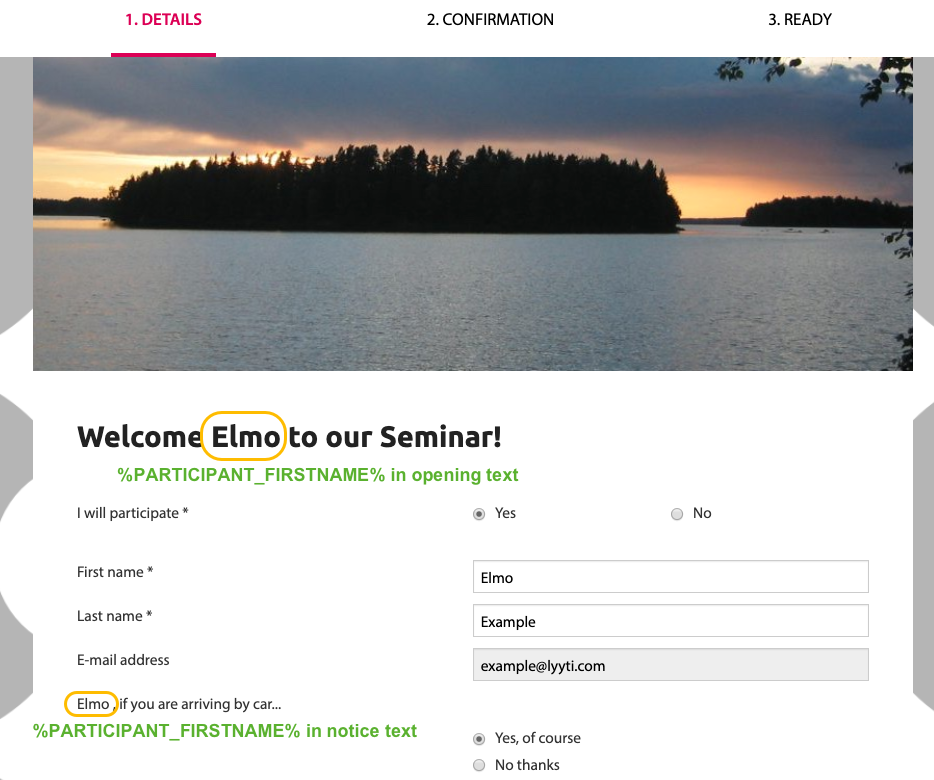
Participant's personal registration link will lead to the personalised registration page:
Confirmation message personalisations
You can use the same personalisation links and texts in confirmation messages as well as in other messages. In addition there are three personalisation texts available only in the confirmation message: Automatic content, Event information and Participant information. These can be found through the Personalisation texts button.
Automatic content includes all event and participant information and additional information that you have ticked to be shown in the confirmation's settings under the Automatic content header. The automatic content is added by default in the confirmation message when creating an event, and it's displayed as the text %AUTOMATIC_CONTENT% in the editing view. Event information includes all event information that's ticked, and Participant information all ticked participant details.
E-mail personalisations
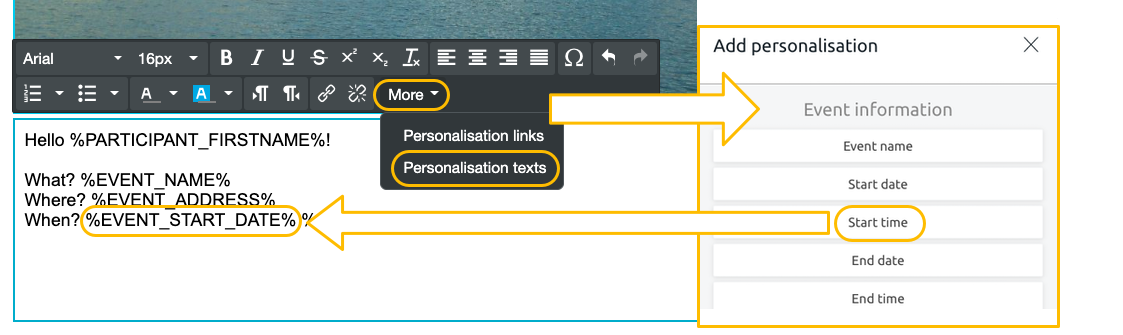
You can add personalisations to e-mails.
1) Above text editor. Click More to open the drop-down-menu.
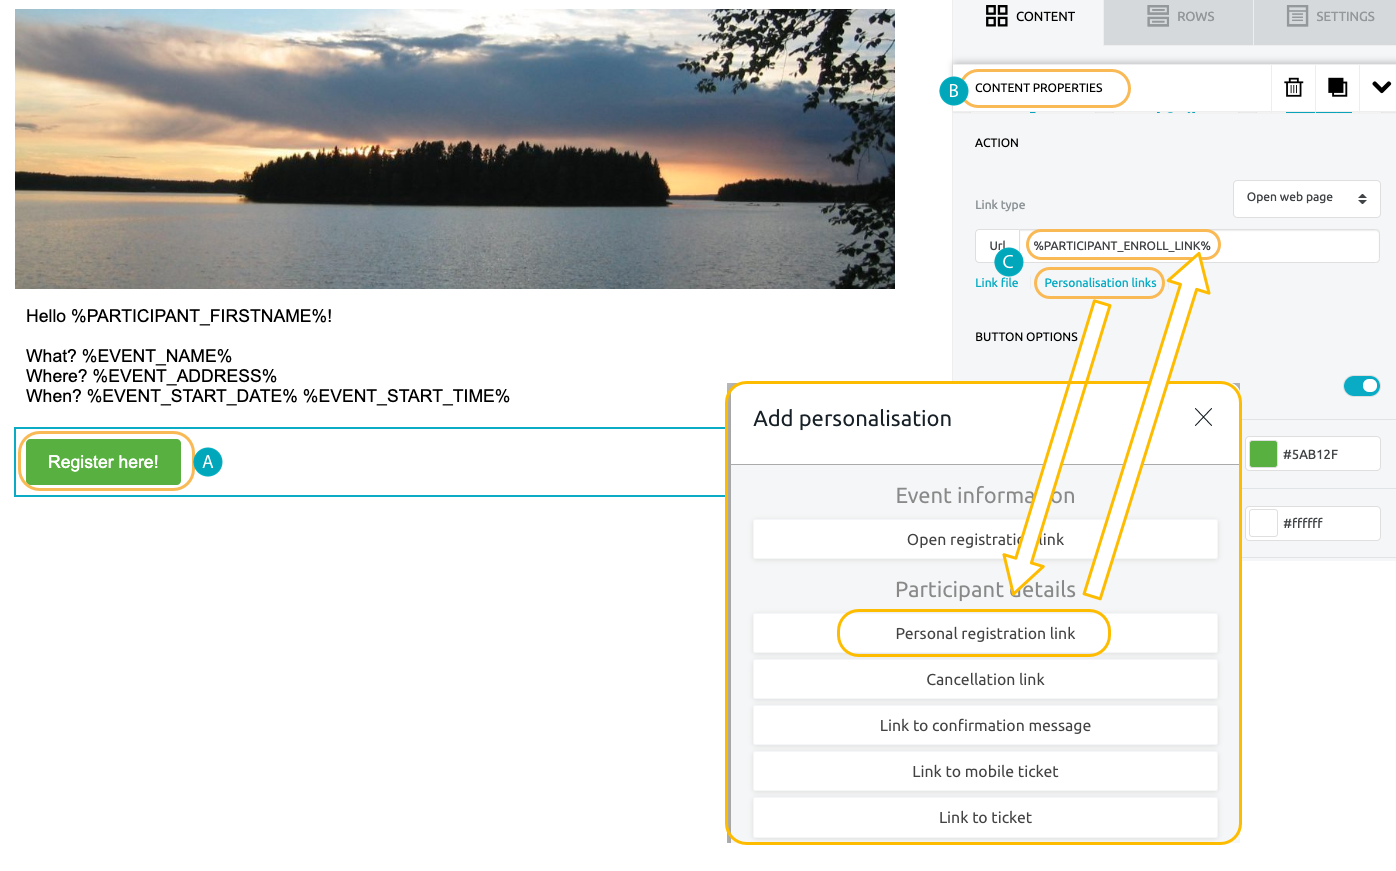
2) If you create a button, you can define what link it contain.
a) Activate the row containing the button by clicking near the button.
b) You see content properties on the right.
c) You can define link type and add a link. Clicking turquoise word Personalisation links will open a list of personalised links.
Comments
0 comments
Please sign in to leave a comment.