In this article you can find tips on how to handle a multiday online event, where you need to distribute several webinar links to different sessions through one event.
Basically you need to create a multiday event using participant types. This allows you to tailor the registration page and add (hidden) notification texts that are only shown in the confirmation messages. Confirmation messages obey the participant type selection and this way it is possible to show certain information to certain participant types.
There are pros and cons when creating a multiday event with participant types. These are:
+ Easy and clear for the registrant
+ Making changes is easy both for the registrant and the organiser
+ Possibility to add capacities per event date
+ Possibility to use the automatic waiting list per date
- Cannot use the automatic calendar note
- If each event has a different registration deadline, the organiser is responsible of opening/closing each registration by hand
- Cannot use the Online connector and automatic follow-up of attending participants
How to create a Multiday Online event
In our example event we created a group registration with participant types:
1. On the Event information page select the days of the whole webinar series, ie. from the first webinar to the last.
2. Set times for registration accordingly
3. Set the location type "in-person". This way there won't be any automatic join online event -links in confirmation messages. You can leave all other location fields empty.
4. Mark your event as a group registration and add participant types (webinar dates) on the Settings page. Group registration allows participants to choose more than one participant type (webinar day). Set capacity within group > minimum 1, maximum 1. This way only one person registers, but can click which webinar dates they are interested in. NB: This causes the waiting list of the event to not work. If you wish, you can leave the minimum empty, and set the maximum as 1. That way instead of a neat checkbox, the participants see a dropdown menu with the options 0 and 1, but you can use the waiting list.
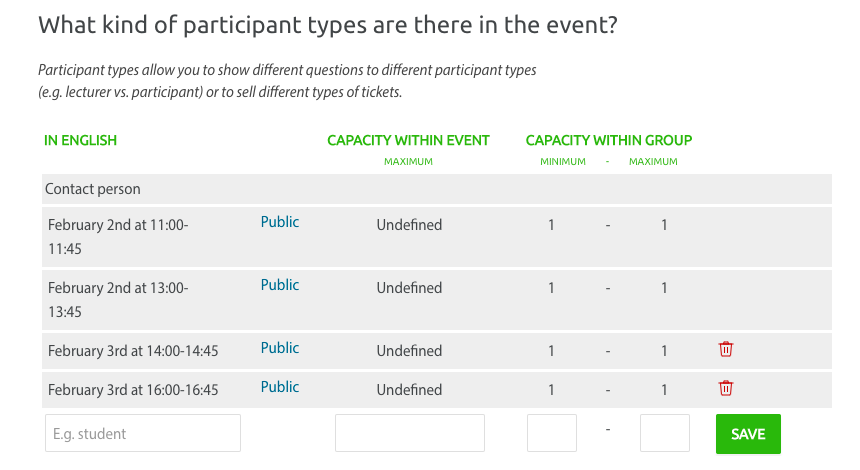
If participants can only choose one day, use individual registration, but still add participant types.
5. On the registration page, ask all required information from the contact person. In a group registration, there is an extra tab for participant questions.
Participants questions
- Add a notice text for each participant type (webinar day)
- Add a hyperlink to the online platform where the webinar is held (e.g. Teams-link)
- Hide notice texts by removing the language choice. This way these notice texts won't be visible on the registration page, but can be added to the confirmation message.

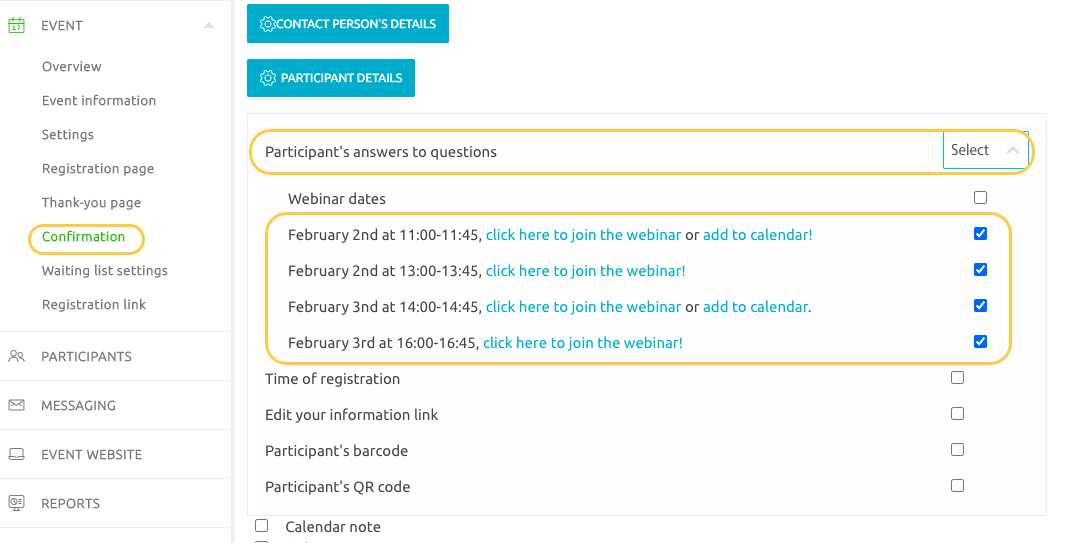
6. Open Participant details in Confirmation message: Participant's answers to questions > in drop-down menu click Select > select the notice texts that you added in #5 to be shown in the confirmation. Save.
Even though all notice texts are now enabled, the confirmation message will obey participant type selection - ie. each notice text will only be shown to the participant type chosen on the registration page settings.
P.S.
You can send links to participants' confirmation messages in Messaging. This allows you to remind your participants closer to the webinar date :)
Create a message and add Link to confirmation message under personalisation links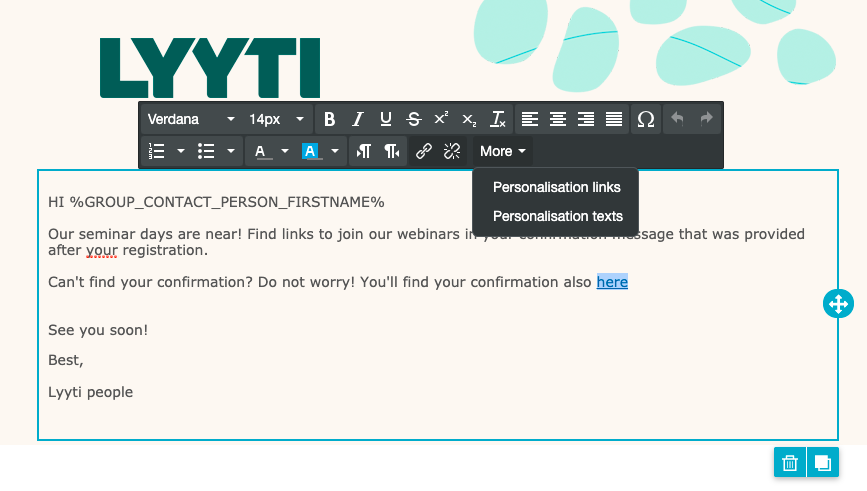
Tips
If you need participant type specific calendar marks, you can create those outside Lyyti. For more detailed information how this can be done is in this article.
Participants' view
1. Participant selects the webinar day(s)
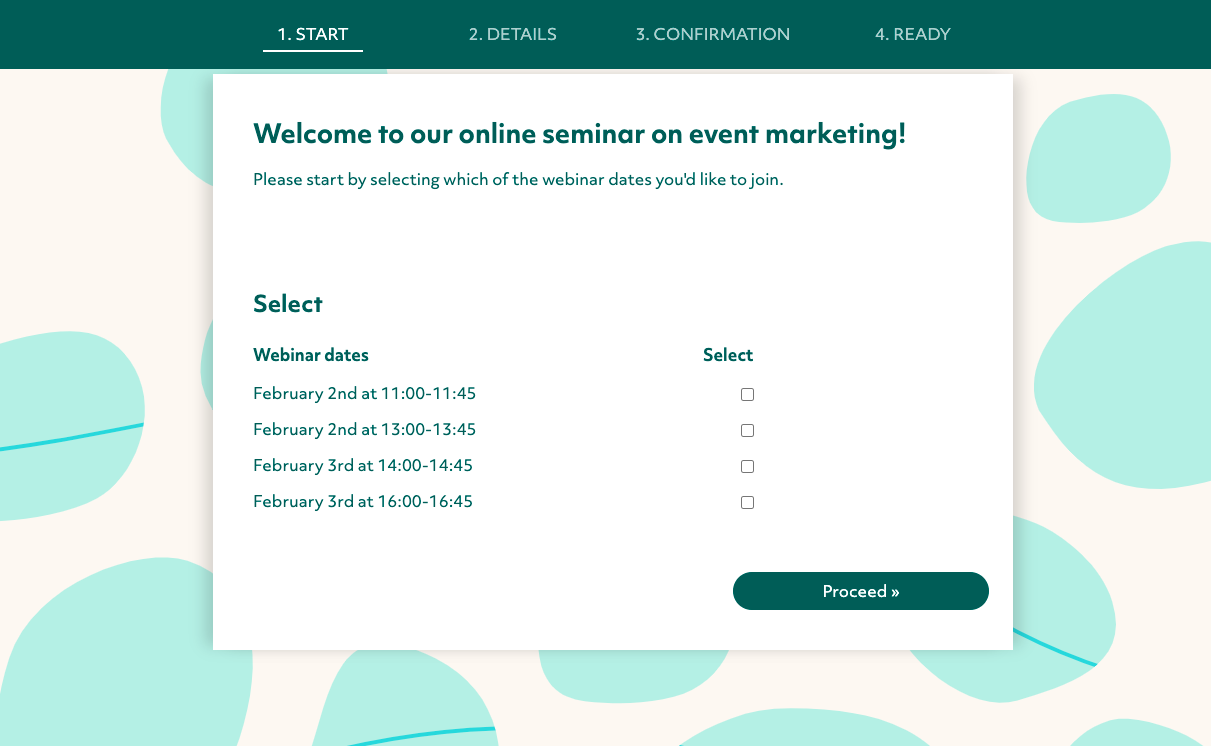
2. Participant will fill in their information and after they've completed their registration they will receive a confirmation message. There they will receive links to the webinar: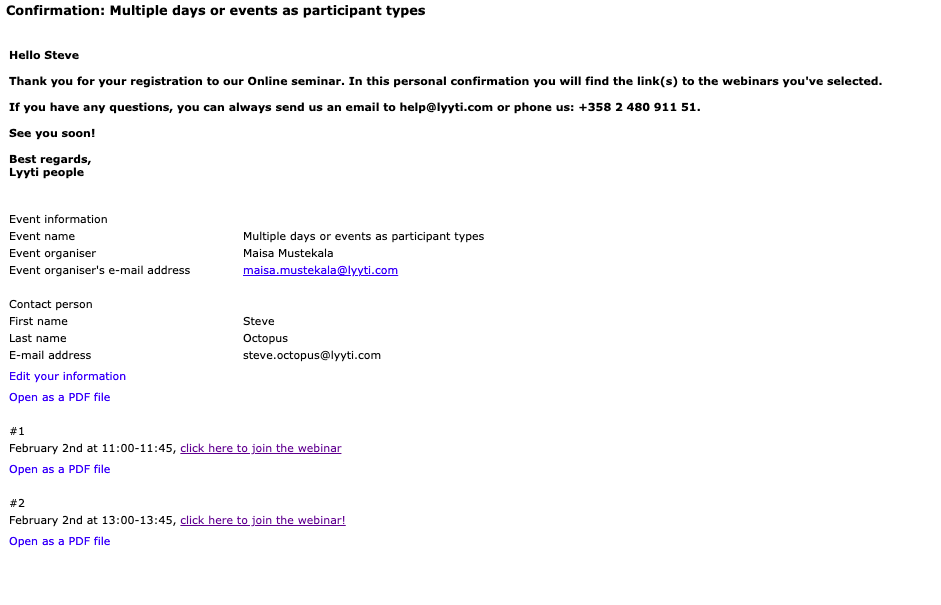

Comments
0 comments
Please sign in to leave a comment.