
Please be aware that Lyyti is developed constantly and your view might not match 100% with the view described in this article.
To send invitations from Lyyti, first you need to import a list of invitees.
1) Import invitees from Excel
Go to your event and, in the menu, click Participants and then, in the top right corner click:
1. Add participants
2. Add participants from Excel

A new page opens. Now, open your Excel sheet with the list of invitees' e-mail addresses.
1. In Excel, copy the information you wish to import and paste it into Lyyti's import field. Copy only the contents and leave out column titles and such.
2. Use the given drop-down menus to determine the order of the data in your Excel file. If there are unnecessary columns you don't need to import, select --Empty-- in the corresponding drop-down.
3. If your Excel file is long and may contain incomplete contact information entries, you can use the Mandatory boxes to weed out insufficient or unqualified contacts. Let's say you need every person on the list to provide their e-mail address; tick Mandatory for the column that contains the e-mail address. All contacts who have haven't got an e-mail address will be left out.
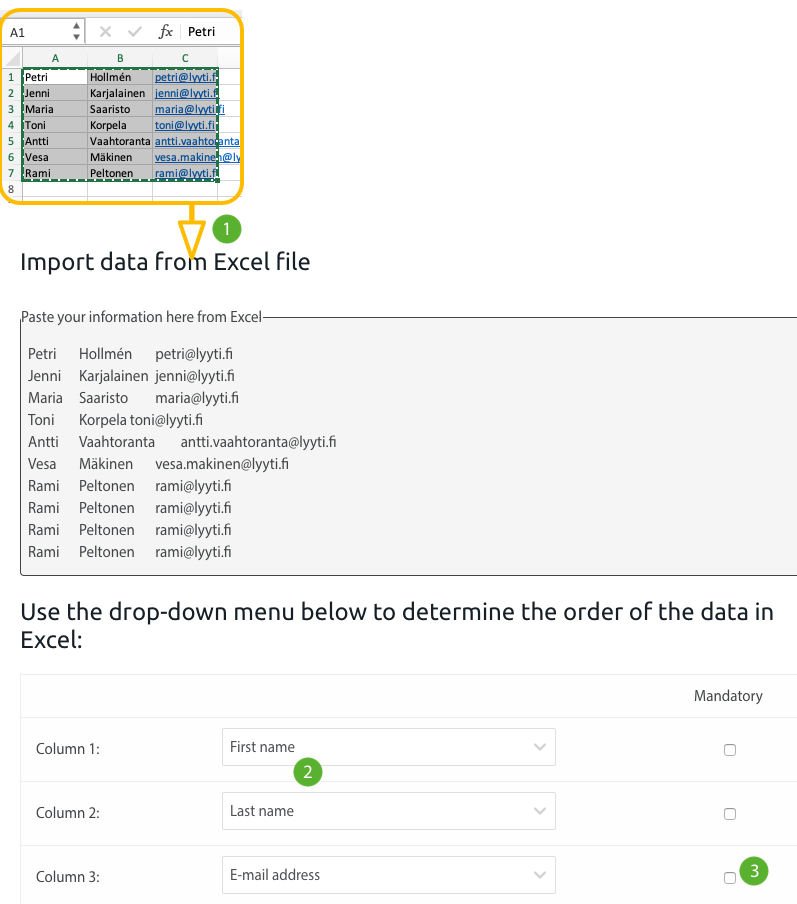
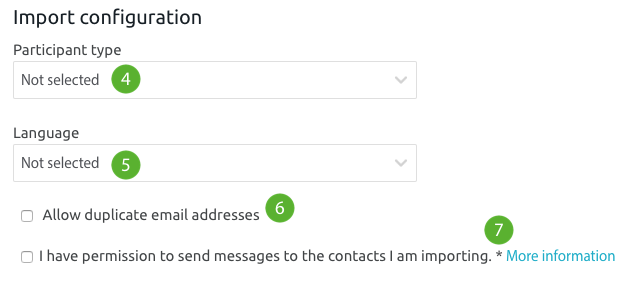
4. If your event has participant types, you can select a participant type to apply to all contacts in this import.
5. In a multilingual event you can set a language for these contacts.
6. Lyyti automatically leaves out duplicate e-mail addresses (and compares the list to be imported with the addresses already in the event). If, however, you wish to allow duplicate e-mails to be imported, select Allow duplicate e-mail addresses.
7. Click I have permission to send messages to the contacts I am importing.
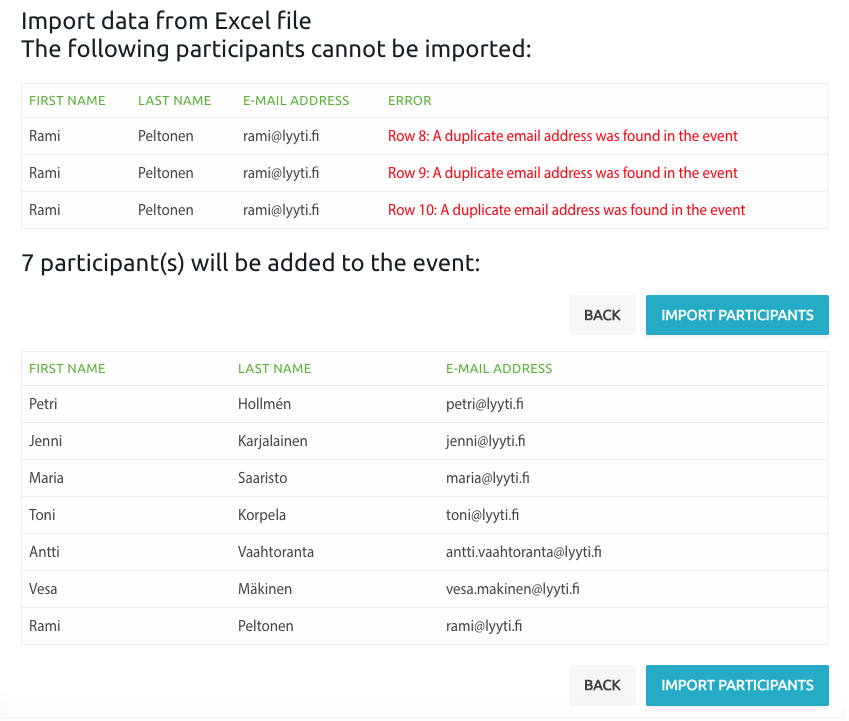
Finally, click Preview to see that all information is placed in the correct columns.
a. If everything is OK, click Import attendees.
b. If there are formally incorrect e-mail addresses, click Back to edit the contents.
c. If the list contained duplicate addresses, you get a list of all duplicates and also of addresses that for some reason cannot be imported (e.g. wrong form). Go Back to edit or simply import the ones that can be imported by clicking Import attendees.
Participants can now be found in your event - their status is not reacted. Next, let's create and send the invitation.
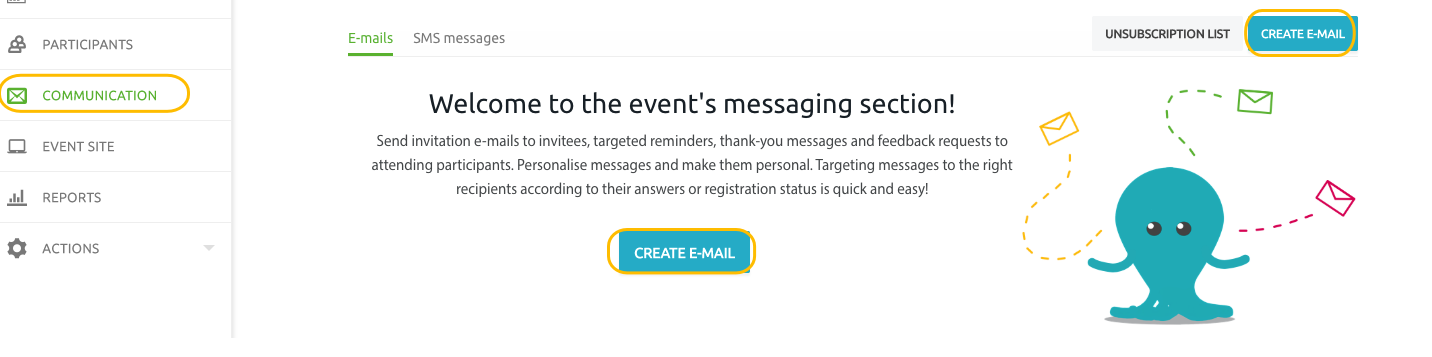
2) Create and send invitation e-mail
Create a new e-mail by clicking Create e-mail under Messaging in the menu to the left.
Creating a message:
How to use Lyyti's messging editor? See more detailed instructions here:
Messaging editor
and video: Communication in Lyyti (25min)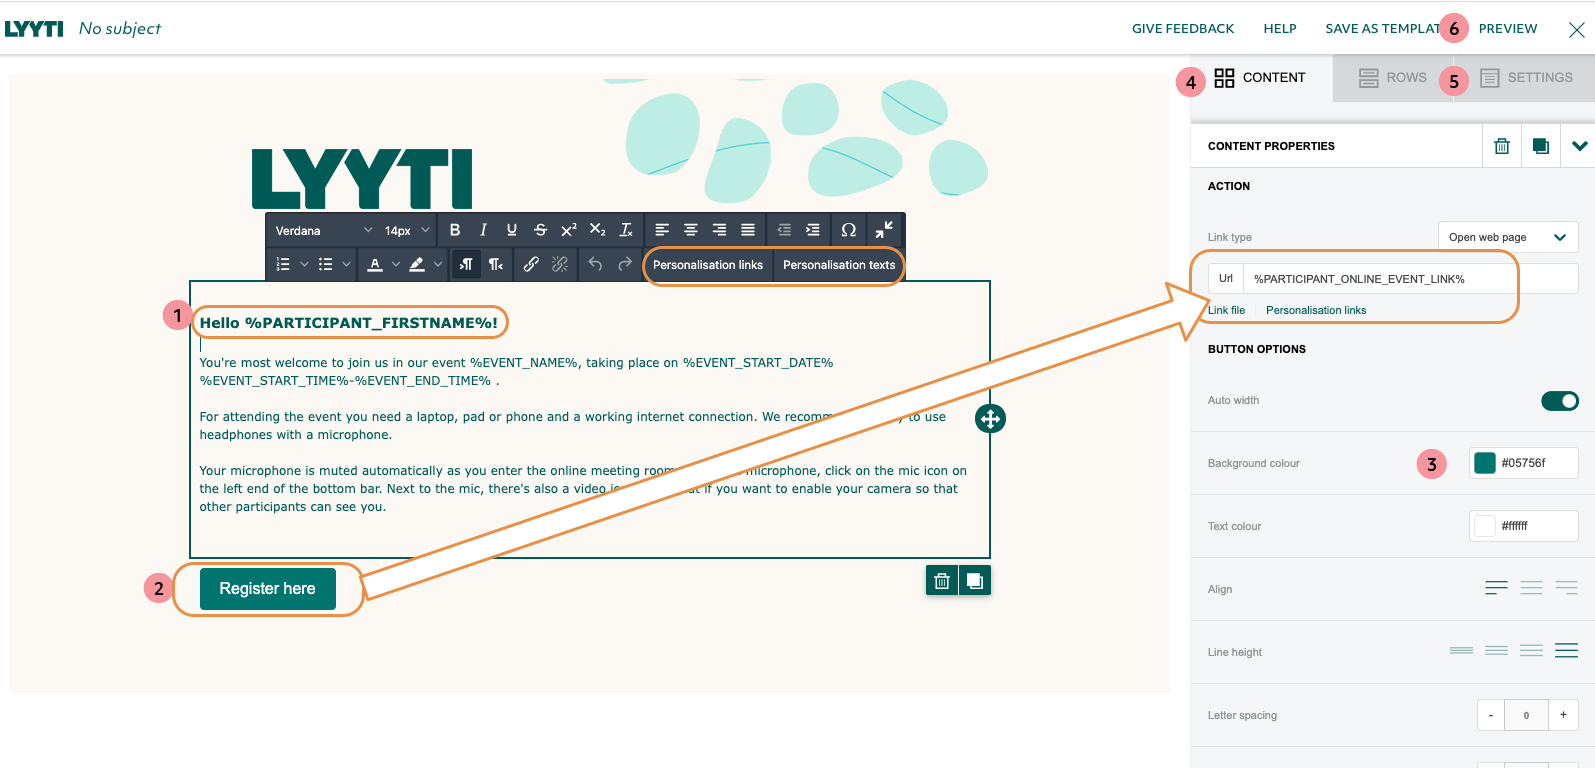
1. By adding text content you can write your invitation message. You can change the font, change its colour etc. You can add personalised texts and links (e.g. personal registration link) to your text
2. Button content allows you to add e.g. personal registration link or a personal online event link (in the picture) as a button. Change the URL for your button by adding the address. If you wish to use personalised links, e.g. personal registration link, click on the turquoise text Personalisation links.
3. You can edit button options, for example change the colour of your button. To edit the text on your button, simply click on the button.
4. You can drag and drop new content to your message from the menu on the right. If you add social media buttons, remember to change link URLs
5. Settings will affect the whole message. Here you can edit your message width, background colours, default font and link colours.
6. You can preview your message, both in desktop mode and in mobile mode.
7. After you've finished with the message, click Save and Close. You'll return to the messaging front page where you can either
a) send a test message to yourself (recommended!)
b) schedule the message
or
c) send it immediately
When invitees receive your e-mail and register through their personal registration link, their status will change from not reacted into participant. Or if they decline, they will show as declined. This way your list of participants will always be up to date and you know which participants haven't reacted to your invitation, and can message them separately.
Comments
0 comments
Please sign in to leave a comment.